728x90
오늘 공부 : 0603 리액트 crud 연습
다음주는 페이지네이션, 라우터
npx create-react-app react-student-crud
vscode 내부터미널에서는 이미 react-student-crud 폴더 위치로 잡혀있으니까 npm start 하면 바로 실행이됨.
리액트 프로젝트는 기본 3000번 포트에서 실행된다.
리액트(3000) - express(4000) - MySQL(3306)
포트 참고해서 node.js 다시 공부할 때 이렇게 설정하기
components -> InputComp.js 생성 (클래스형 컴포넌트)
1. 클릭과 체인지 되는거 확인하기
    addStudentInfo=()=>{
        alert('추가')
    }

    idChange=()=>{
        console.log('id change!')
    }
    nameChange=()=>{
        console.log('name change!')
    }
    majorChange=()=>{
        console.log('major change!')
    }
render(){
return(
<div id='input-comp'>
<input tupe='text' placeholder="학번입력"
onChange={this.idChange}/>
<input tupe='text' placeholder="이름입력"
onChange={this.nameChange}/>
<input tupe='text' placeholder="전공입력"
onChange={this.majorChange}/>
<button onClick={this.addStudentInfo}>추가</button>
</div>
)
}
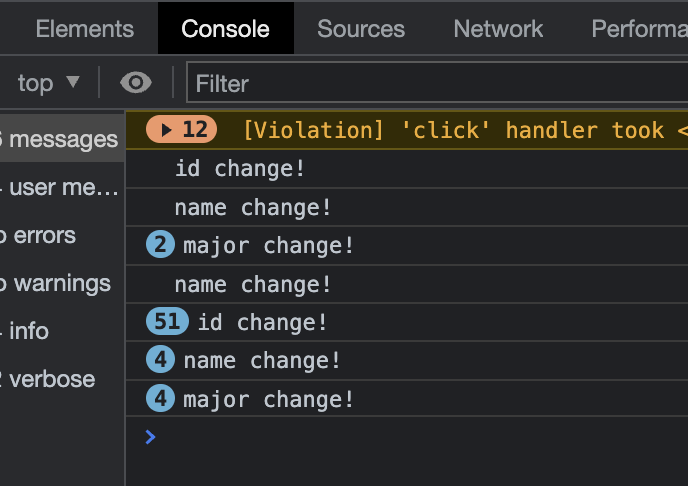
인풋에 값을 입력하면 콘솔창에서 이벤트실행 확인가능.
2. 인풋값 상태값 바뀌는거 확인하는법 e.target.value
    idChange=(e)=>{
        console.log(e.target.value)
    }
    nameChange=(e)=>{
        console.log(e.target.value)
    }
    majorChange=(e)=>{
        console.log(e.target.value)
    }
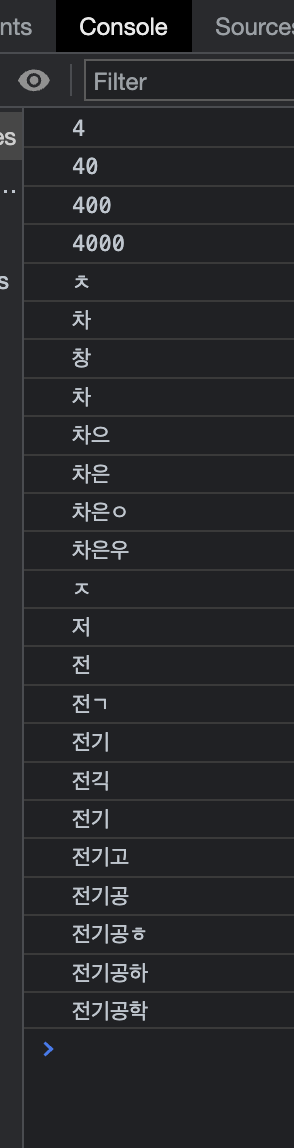
콘솔창에서 바뀔때마다 확인가능
3. 인풋값을 상태값에 저장하는법
class InputComp extends Component{
    constructor(props){
        super(props)
        this.state={
            id:'',
            name:'',
            major:''
        }
    }
idChange=(e)=>{
console.log(e.target.value)
this.setState({
id:e.target.value
})
}
nameChange=(e)=>{
console.log(e.target.value)
this.setState({
name:e.target.value
})
}
majorChange=(e)=>{
console.log(e.target.value)
this.setState({
major:e.target.value
})


4. 이제 App의 추가함수를 InputComp에 주입시키고
InputComp에서 사용하게 해주면
InputComp의 값을 App로 넘기게 할 수 있음 (하위->상위 데이터 전달)
App.js
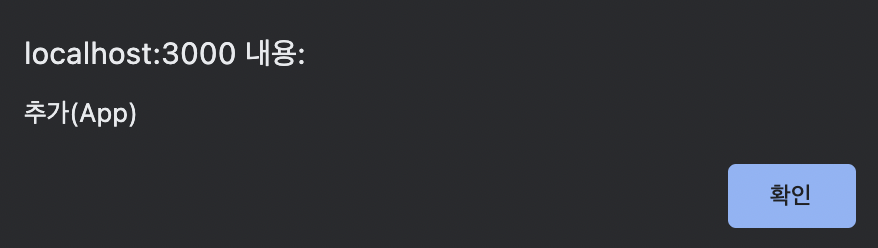
addStudentInfo=()=>{ // 실질적인 추가기능은 App.js (데이터가 여기 있기 떄문)
alert('추가(App)')
}App.js
return(
<div id='App'>
<InputComp addStudentInfo={this.addStudentInfo}/>
{result}
</div>InputComp.js
addStudentInfo=()=>{
alert('추가(InputComp)')
this.props.addStudentInfo() //App의 추가함수
}경고창 추가 (App) 뜨면 InputComp와 App가 연결 된 거임
5. 이제 InputComp 함수에 매개변수 추가해서 날려줘야함.
InputComp.js

addStudentInfo=()=>{
        alert('추가(InputComp)')
        const {id,name,major} = this.state //비구조화할당, 구조분해할당
        this.props.addStudentInfo(id,name,major) //App의 추가함수
        //this.props.addStudentInfo(this.state.id, this.state.name, this.state.major )
    }
App.js
addStudentInfo=(id,name,major)=>{ // 실질적인 추가기능은 App.js (데이터가 여기 있기 떄문)
alert('추가(App)')
alert('넘어온 학번: '+id)
alert('넘어온 이름: '+name)
alert('넘어온 전공: '+major)
}경고창으로 확인가능.


7. 넘어온 값 다 확인 됐으니
JSON형태로 뭉쳐주기
App.js
addStudentInfo=(id,name,major)=>{ // 실질적인 추가기능은 App.js (데이터가 여기 있기 떄문)
alert('추가(App)')
alert('넘어온 학번: '+id)
alert('넘어온 이름: '+name)
alert('넘어온 전공: '+major)
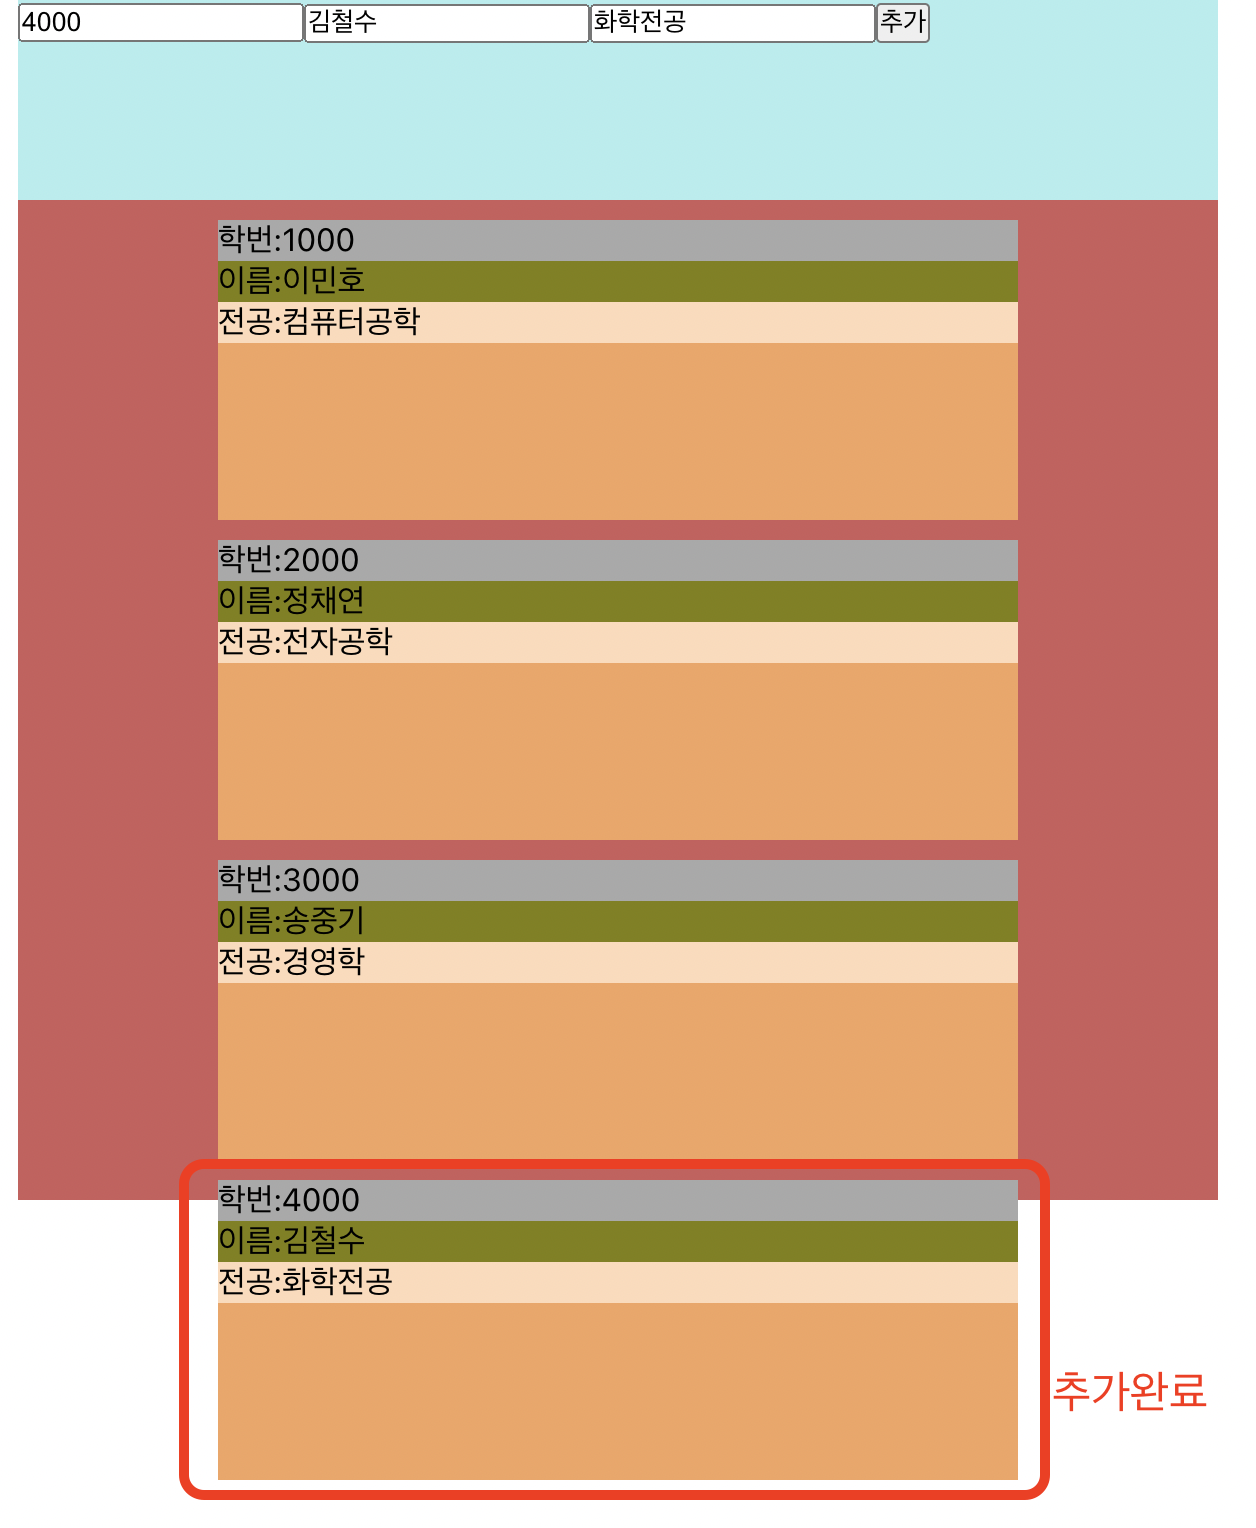
const studentObj = {id:id, name:name, major:major}
const concatedList =this.state.studentList.concat(studentObj) //추가된 리스트
this.setState({
studentList:concatedList
})
}concat 으로 배열에 추가.
728x90
'React' 카테고리의 다른 글
| [React] To do List 만들기 / CRUD 수정하기 완료 + 완료파일첨부 (0) | 2023.06.04 |
|---|---|
| [React] CRUD 수정 (0) | 2023.06.04 |
| [React] CRUD 삭제 (0) | 2023.06.03 |
| [React] map 메서드 (0) | 2023.05.21 |
| [React] 클래스형 컴포넌트로 클릭카운터 만들기 (1) | 2023.05.20 |


